TABLE OF CONTENTS
You can register by signing in to the Authenticator app directly, by using Security info, or from your mobile device browser or through cross-device registration by using another device, such as a laptop. Your mobile device needs to run Android version 14 or later.
Use Authenticator (Android)
You can sign in to Authenticator to create a passkey in the app and get seamless single sign-on across Microsoft native apps. This flow is the recommended way to set up a passkey in Authenticator. If you're signed in or already have an account in Authenticator, you still need to complete these steps to add a passkey in Authenticator.
Download Authenticator from Google Play, open it, and go through the privacy screens.
Add your account in Authenticator on your Android device:
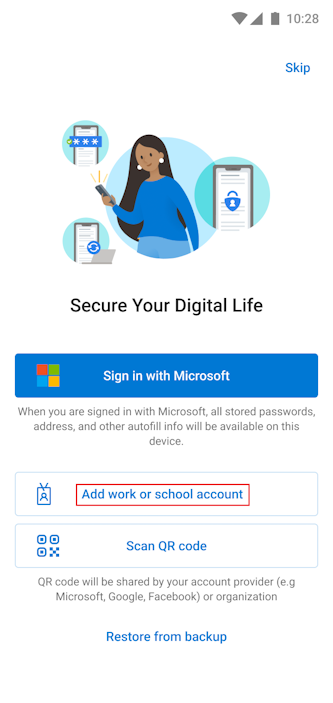
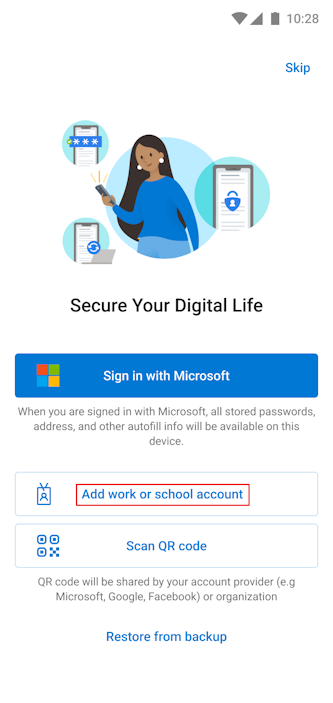
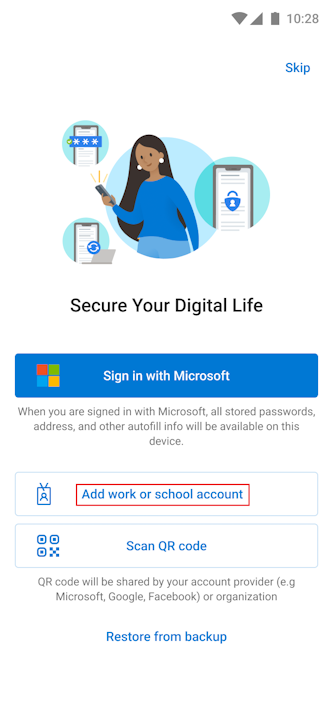
If you installed Authenticator for the first time on your device, on the Secure Your Digital Life screen, tap Add work or school account.
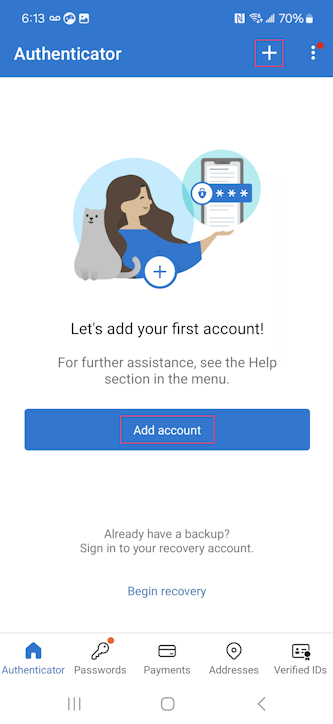
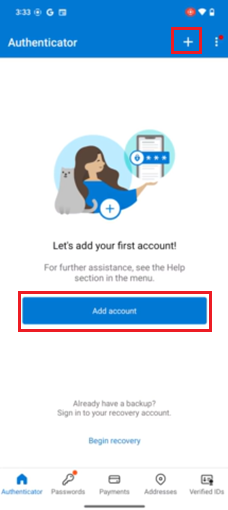
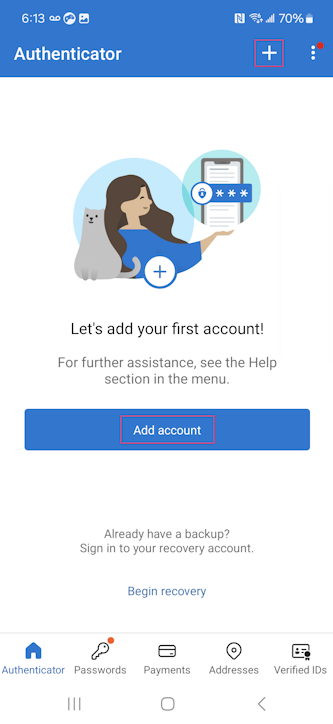
If you installed Authenticator on your device before but didn't add an account, tap Add account or the + button, and select Work or school account. Then tap Sign in.
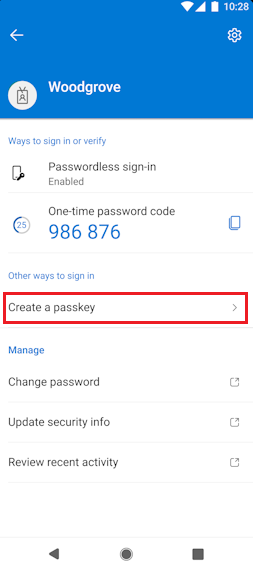
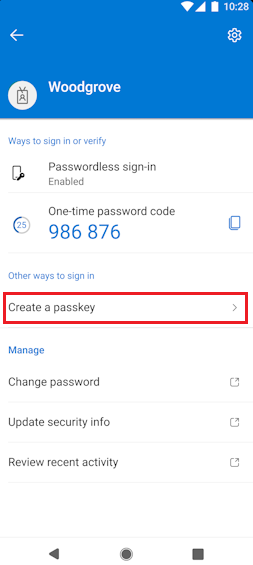
If you already added an account in Authenticator, tap your account, and then tap Create a passkey.
Complete multifactor authentication (MFA).
If necessary, tap Settings and set up a screen lock.
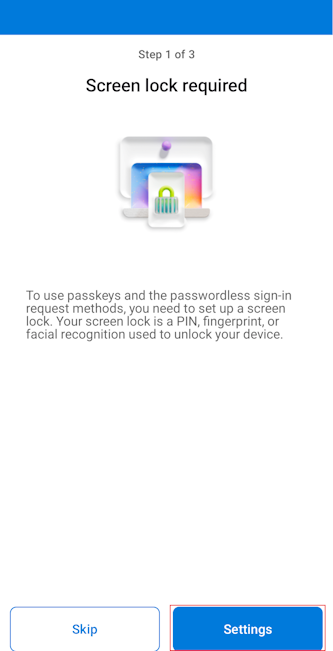
Tap Settings to enable Authenticator as a passkey provider.
Note
The steps to enable passkey providers on Android might vary based on the make and model of your device. Search for Passkey on your device settings, or consult your device manufacturer for guidance. If your device runs Android 14 and you can't enable Authenticator as a passkey provider, we recommend that you upgrade to Android 15.
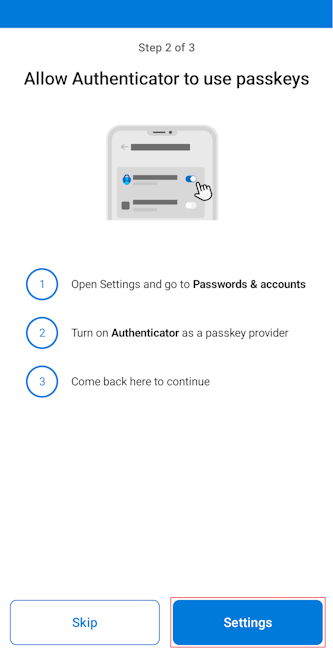
Open Passwords & accounts.
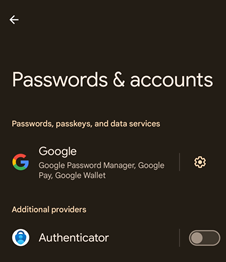
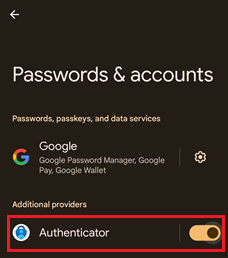
In the Additional providers section, make sure that Authenticator is selected.
After you return to Authenticator, tap Done to confirm that you added Authenticator as a passkey provider. Then you can see Passkey added as a sign-in method for your account. Tap Done again to finish.
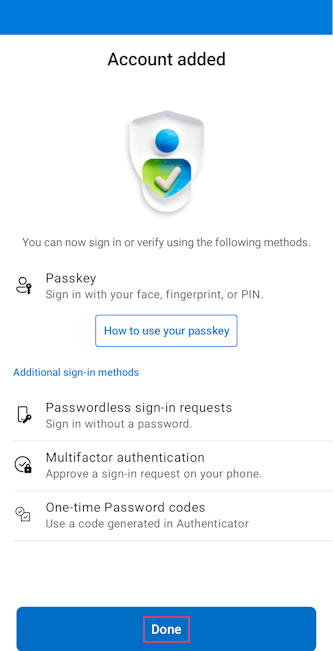
Authenticator sets up passkey, passwordless, and MFA for sign-in according to your work or school account policies. Tap your account to see information, including your new passkey.

Use Security info (Android)
On the same Android device as Authenticator or by using another device, such as a laptop, open a web browser and sign in with MFA to Security info.
On Security info, tap + Add sign-in method and select Passkey in Microsoft Authenticator.
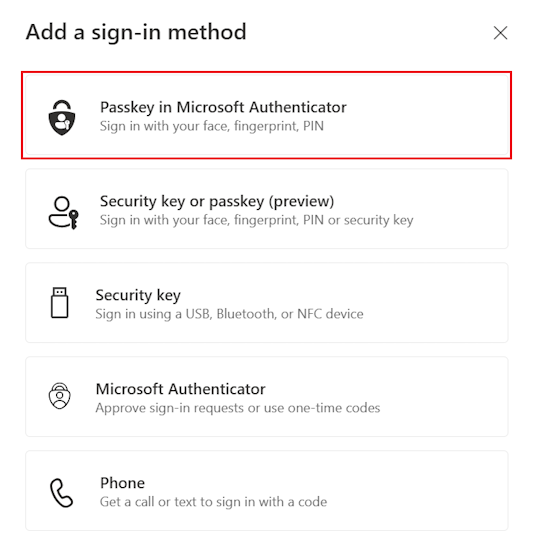
If prompted, tap Next and sign in with MFA.
If necessary, download Authenticator to your Android device. You can select Microsoft Authenticator and scan a QR code to install Authenticator from Google Play. After you download Authenticator to your Android device, select Next.
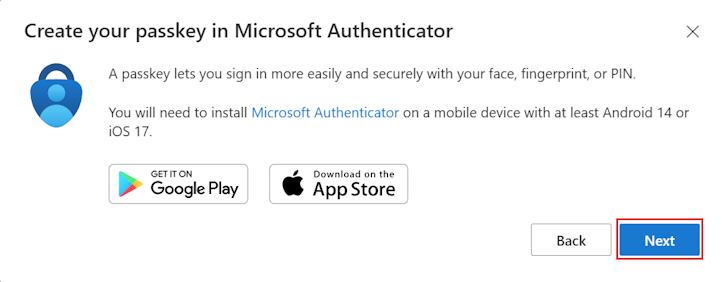
You're prompted to open the Authenticator app and create your passkey there.
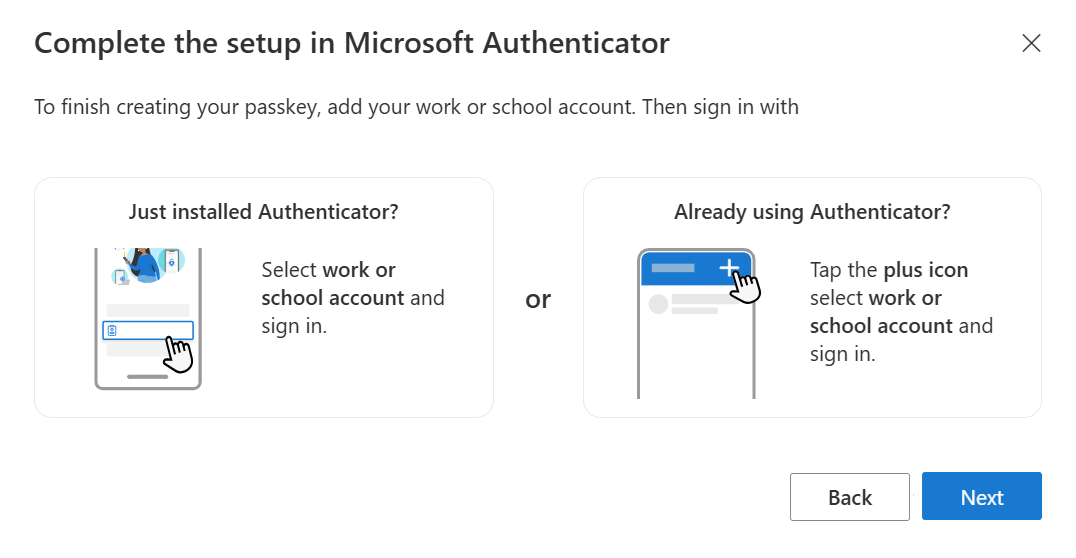
Open Authenticator and go through the privacy screens, as needed.
If you installed Authenticator for the first time on your device, on the Secure Your Digital Life screen, tap Add work or school account.
If you installed Authenticator on your device before but didn't add an account, tap Add account or the + button, and select Work or school account. Then tap Sign in.
If you already added an account in Authenticator, tap your account, and then tap Create a passkey.
Complete multifactor authentication (MFA).
If necessary, tap Settings and set up a screen lock.
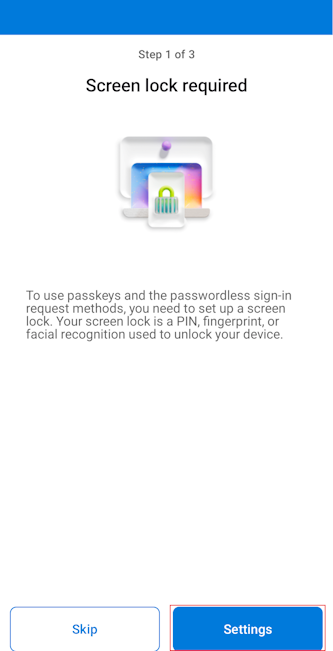
Tap Settings to enable Authenticator as a passkey provider.
Note
The steps to enable passkey providers on Android might vary based on the make and model of your device. Search for Passkey on your device settings, or consult your device manufacturer for guidance. If your device runs Android 14 and you can't enable Authenticator as a passkey provider, we recommend that you upgrade to Android 15.
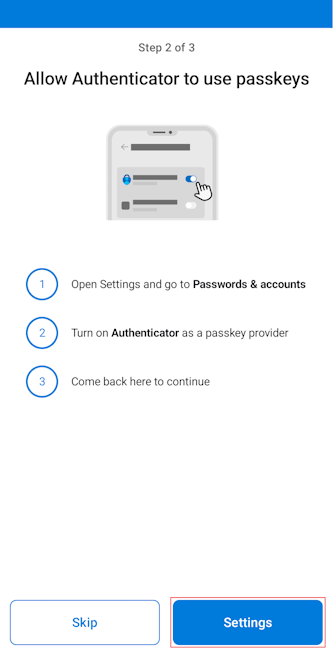
Open Passwords & accounts.
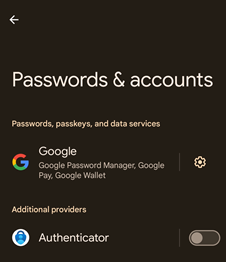
In the Additional providers section, make sure that Authenticator is selected.
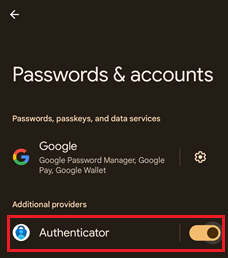
After you return to Authenticator, tap Done to confirm that you added Authenticator as a passkey provider. Then you can see Passkey added as a sign-in method for your account. Tap Done again to finish.
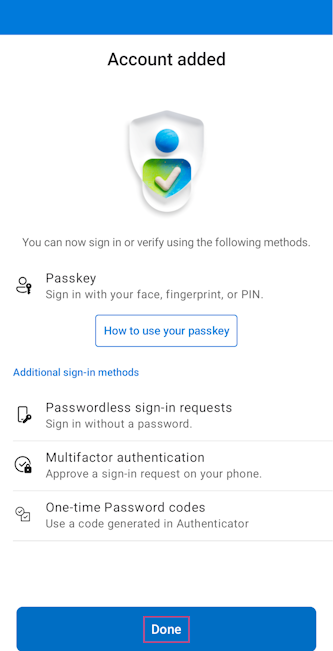
Authenticator sets up passkey, passwordless, and MFA for sign-in according to your work or school account policies.
After you finish the passkey setup in Authenticator, return to your browser where Security info is open. Select Next.
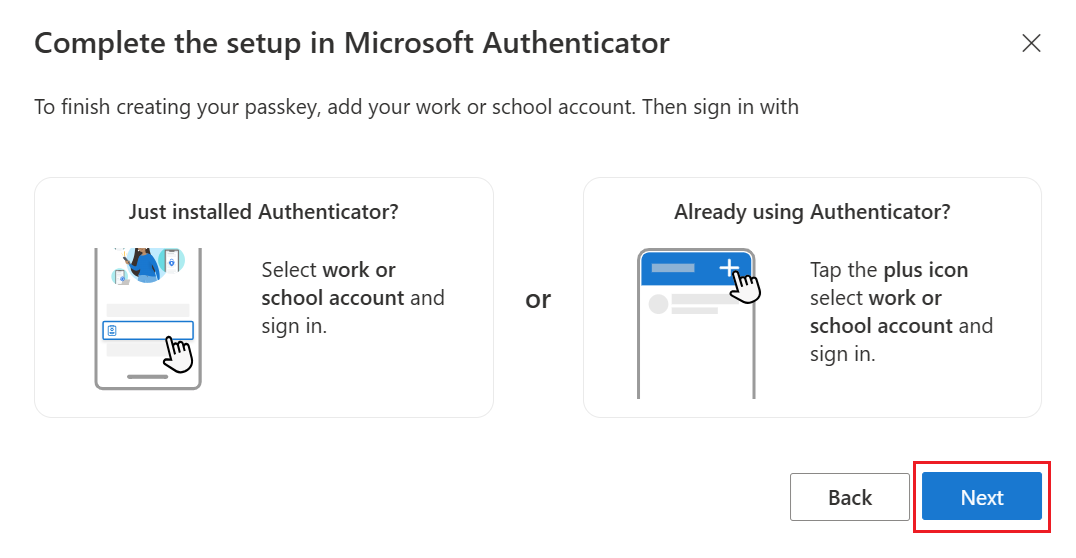
The wizard verifies that the passkey was created in Authenticator.
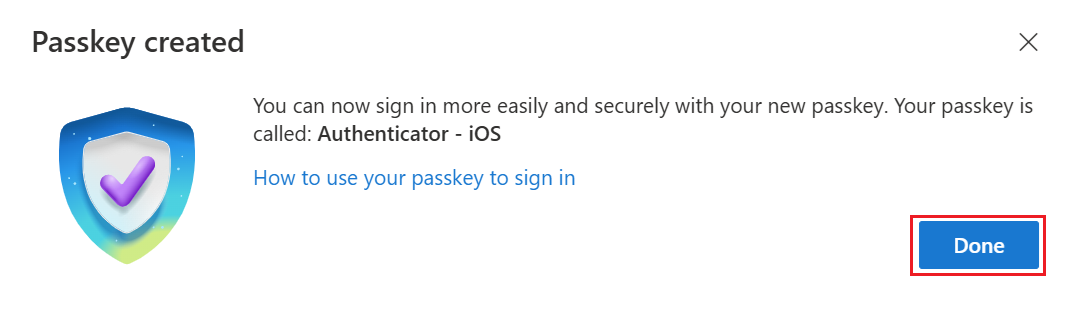
After the passkey is created, select Done.
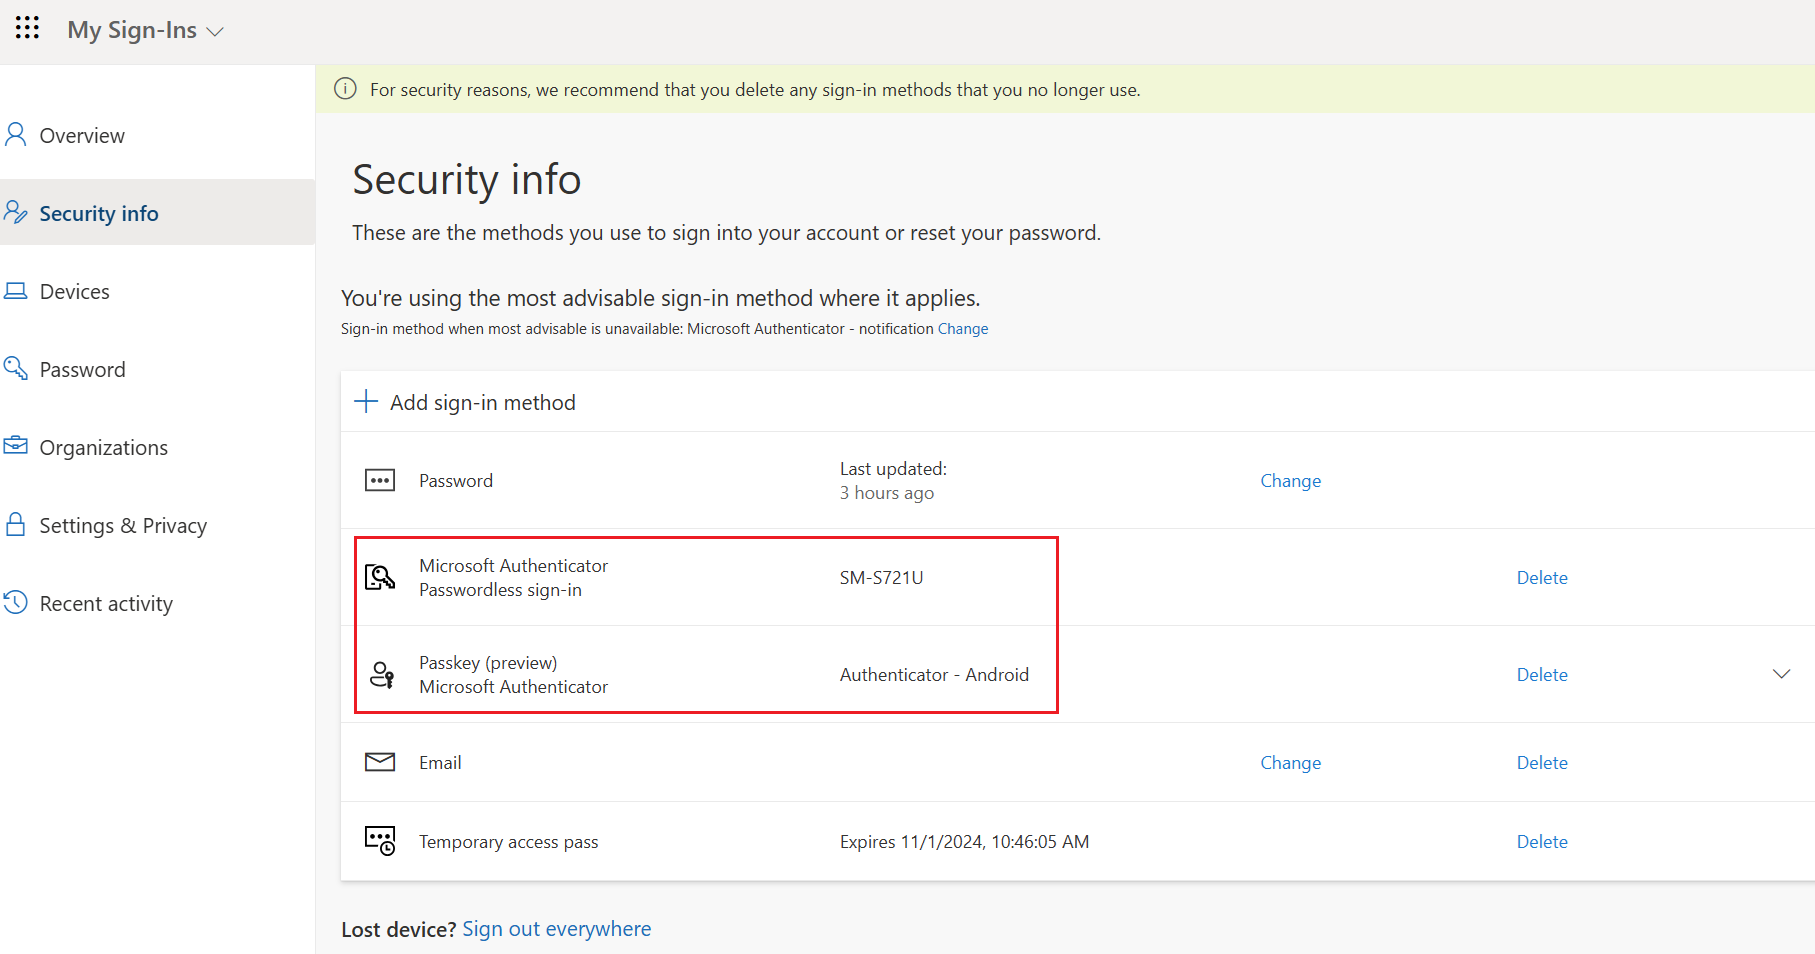
On Security info, you can see that the new passkey was added.
Use WebAuthn flow (Android)
If you can't sign in to Authenticator to register a passkey, you can register directly from Security info with WebAuthn.
Note
You can't register a passkey in Authenticator this way if attestation is enabled by your administrator.
If you sign in to Security info on a different device, you need Bluetooth and an internet connection. Connectivity to the following two endpoints must be allowed in your organization:
cable.ua5v.comcable.auth.com
If your organization restricts Bluetooth usage, you can permit Bluetooth pairing exclusively with passkey-enabled FIDO2 authenticators to allow cross-device registration of passkeys. For more information, see Passkeys in Bluetooth-restricted environments.
On Security info, when you add a passkey in Authenticator, tap Having trouble.
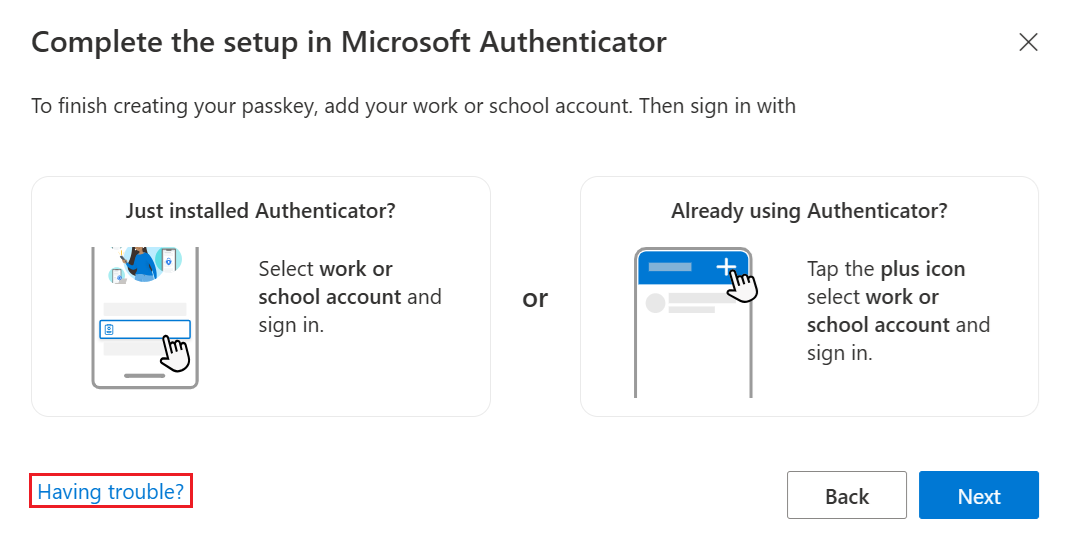
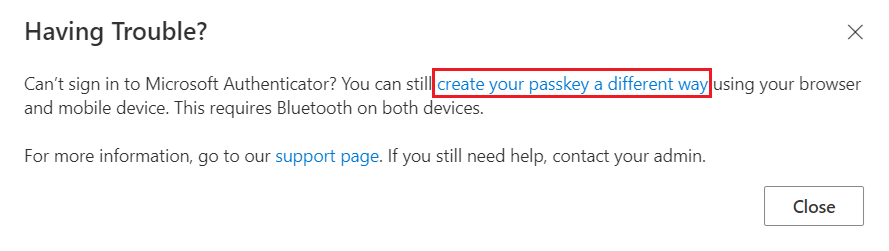
Now, tap create your passkey a different way.
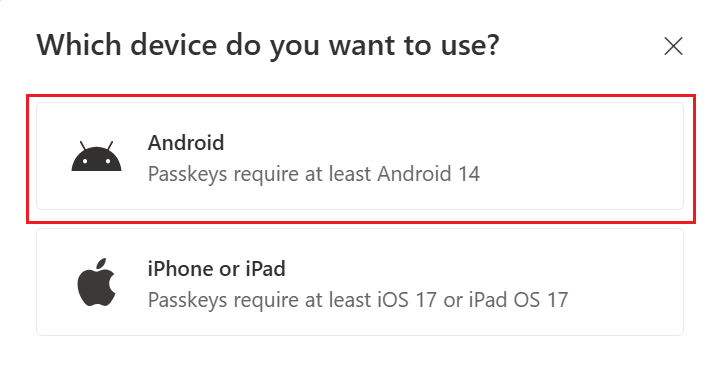
Select Android and go through the rest of the flow to register a passkey on your device.
If a user wants to revert to the original instructions and register a passkey in Authenticator through sign-in:
- On Security info, when you add a passkey in Authenticator, tap Having trouble.
- Now, tap create your passkey a different way by signing in to Authenticator.
- Go through the rest of the flow to register a passkey on your device.
Note
If you register your passkey with the Chrome browser on macOS, allow login.microsoft.com to access your security key or device when prompted.
Delete your passkey in Authenticator for Android
To remove the passkey from Authenticator, tap the account name, tap Settings, and then tap Delete passkey.
In most cases, the passkey is also deleted from Security info. If not, go to Security info and select Delete to remove it.
Troubleshoot passkey registration on Android
In some cases when you try to register a passkey, it gets stored locally in the Authenticator app but isn't registered on the authentication server. For example, the passkey provider might not be permitted, or the connection might time out. If you try to register a passkey and see an error that the passkey already exists, delete the passkey that was created locally in Authenticator and retry registration.
Was this article helpful?
That’s Great!
Thank you for your feedback
Sorry! We couldn't be helpful
Thank you for your feedback
Feedback sent
We appreciate your effort and will try to fix the article